Skin Wrapping A Character Mesh
Psyk0This process will enable you to quicly skin/weight/rig a character for Jedi Academy. You do not need extensive knowledge of 3D Studio Max for this to work.
*Note that some tweaking might be required, this does not cover non standard meshes*
Requirements:3D Studio Max 7 or 8 (could work with max 6 but untested)
A rigged Character (DOWNLOAD HERE) you need this or a previously rigged character.
.GLM importer if you plan on frankenstein-ing body parts together
What is Skin wrapping?
Skin wrapping is essentially taking the information of an existing character's weight distribution and applying it to another. Here's a quick overview of the process (it's quick but that's all there is to it!) :
Since this is written with Jedi Academy in mind let's skin wrap a .glm file to an existing character (which you NEED to DOWNLOAD HERE )
1.Loading and importing your character mesh
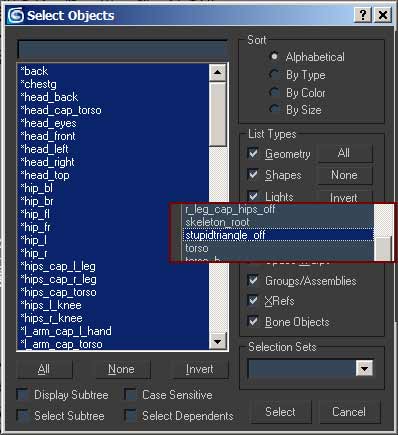
Load the "Skin Wrap SDK" scene into max and go to file import, select GLM as the import format, browse to the desired character's folder location and hit ok. If you plan on making a character with multiple sources, then repeat the import process for each part and always get rid of the tags AND stupid_triangle_off tag.
Go to File menu - import, when prompted, scroll down to GLM, browse to character you want to import and get rid of all the tags named with a * AND studpidtriangle_off tag.
To bring up the selection dialog box, press H.
Select the tags and stupidtriangle_off, click select and then delete, tags are gone.
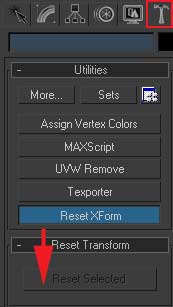
Reminder: always apply a reset xform modifier on YOUR mesh before starting skinwrapping or the weighting process.
After scaling your character, you will need to apply reset Xform too. Simply select all of your character mesh (no tags or bones!), navigate to the utilities tab, click Reset Xform to activate and then Reset Selected.
Finally, with your meshes still selected, right click on one of them (make sure they're still all selected!) go to properties and then convert to: pickeditable mesh.
2.Scaling the imported mesh
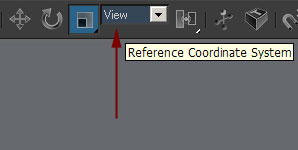
In order to properly scale the imported mesh, you need to change the coordinate system. This will ensure that the split meshes are scaled as 1 object and keep their size and position.
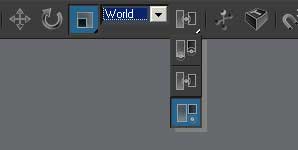
With the scale tool selected (highlighted in blue) click the rollout menu where it's set to view, change to WORLD.
Finally, change the pivot point to USE TRANSFORM COORDINATE CENTER, ( the last one in the list.)
Select your custom character mesh / imported GLM (if you picked a .GLM, double click the hips and it will select all of the character's meshes)
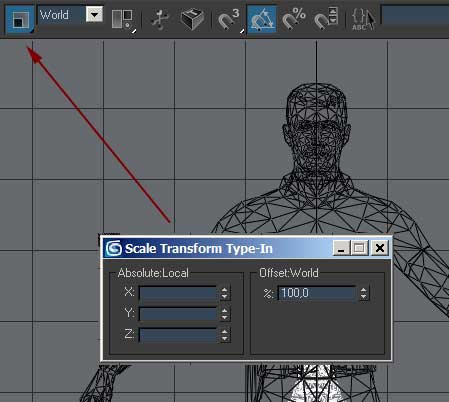
Next RIGHT CLICK ON THE SCALE TOOL, the type-in box will appear.
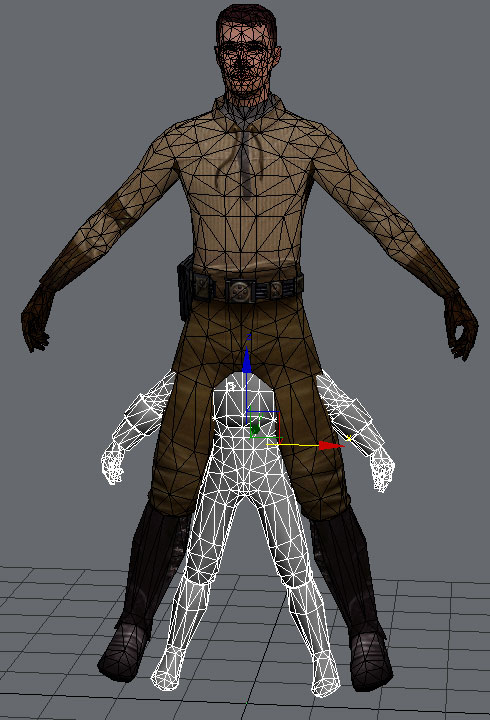
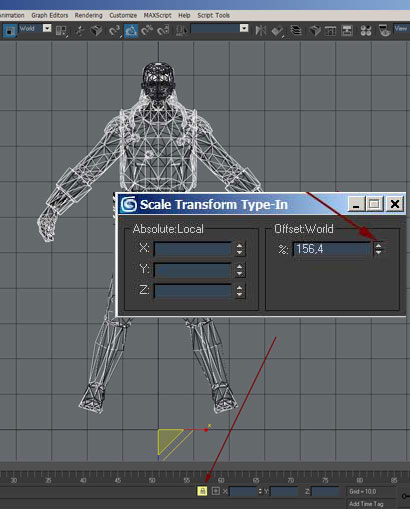
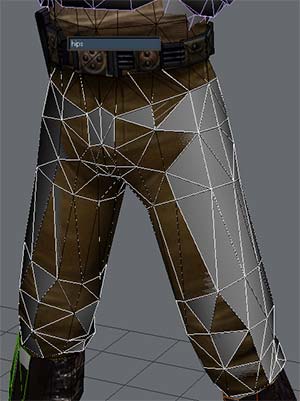
I scaled the imported mesh to 156,4%, i scaled until the wires of the hips lined up with eacher other, which was pretty easy since they both have the same topology. So 156-157% should be the acurate re-scale of all imported GLMs.
TIP: The "lock" icon at the bottom can be useful to make sure you dont deselect anything (pressing space bar will lock your selection, hit spacebar again to unlock )
3.Applying the SkinWrap Modifier
I will only demonstrate how to weight the hips, the same steps are involved for all the other meshes of your character.
If you have created non standard meshes, you will need to manually weight and link them. It's possible this could work for extra parts with acceptable results. You can always check the other tutorials if it fails.
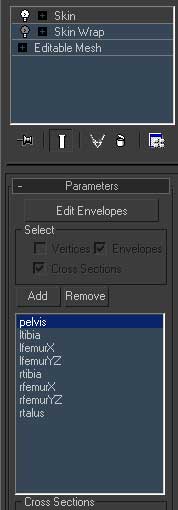
Select your character's hips...
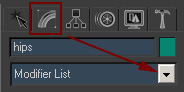
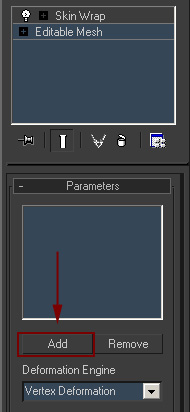
With the hips still selected, click the modify tab and then the modifier list rollout. Press S until you reach Skin Wrap modifier. That's it!
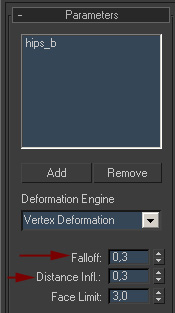
for my imported mesh, the Falloff and Distance influence needed a bit of tweaking so i set them to 0,3 and everything worked great.
In order to check for deformation you can rotate the bones of the skeleton.
WARNING: you need to put the bones back into their original spot everytime you move them!.
The easiest way to keep track of your rotations, is to turn on angle snap. Pressing A will activate angle snaps (or click the icon shown to the right).
You should see the rotation increase by 5 degrees each time you rotate, keep track of the number. So if i rotate 10 degrees forward, i just rotate 10 degrees back to return to original position.
P.S.: I am aware there are 2 skeletons in the scene file. Some FUBAR shit happened and i stiched up the best i could :P, it doesnt prevent compiling a character in any way, it's just like having merged a LOD level.
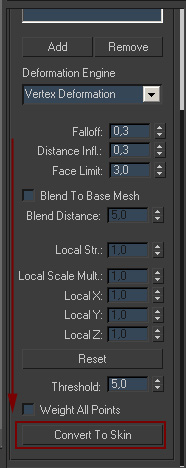
End result after clicking convert to skin,, you can leave the skin wrap modifier where it is, it shouldnt be a problem since it's turned off, do not move it above the skin modifier.
Once all the weighting is done you will need to link the hierarchy properly with the autolink maxscript.
Note that the caps were not included but should be weighted in same manner as their parent mesh. As usual any non standard meshes will need to be linked manually...see this guide for more info.
Done.